MacBook Air 13" Screen Replacement, Lines On Screen - MacBook Air 13" 2017
Posted by eFix Ltd on
In this case study, we have a MacBook Air 13" 2017 A1466 model with lines on the screen. The MacBook otherwise functions fine via an external monitor, so the screen/LCD will need replacing to resolve the issue. In this repair, we replace the LCD panel itself, instead of the whole top assembly, which works out cheaper for the customer and ensures we can reuse their original camera and bezel (which often aren't original on full assembly replacements).
Visually inspecting the device, there are no cracks in the screen to cause this issue, but the screen is not showing up at all, being mostly white with different coloured lines.
This is a common issue on the 2010-2017 MacBook Air 13" models, and there is always a fracture down the left hand side of the LCD (under the silver bezel) which causes the screen to go white with lines. In this case, usually this is a result of a drop or impact which doesn't immediately cause the issue to occur, but over time, the fracture gets worse and eventually completely stops the screen from working.

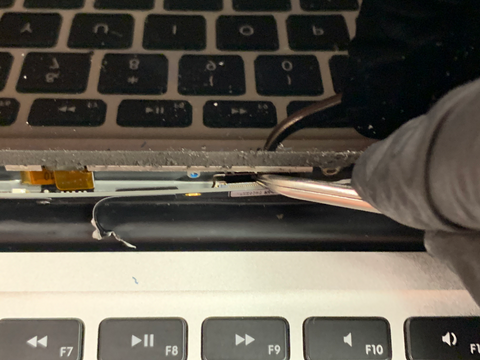
To start with, we need to remove the silver bezel surrounding the screen assembly. We use heat and a painting knife, which can cut through the adhesive holding the bezel on, without bending the silver bezel out of shape. We see a lot of DIY attempts for this repair, and often the silver bezel is extremely curved and bent out of shape (due to the repairer lifting the bezel), which is why we do not do this.


Once the bezel is off, we remove the old adhesive on the bezel and lid assembly, replacing the adhesive on the bezel with our own, in preparation for when we finish replacing the LCD panel.
Next, we unscrew the bottom of the LCD PCB from the lid assembly, being careful to unplug the backlight cable and LCD cable, before unravelling this out of it's folded position.


After this, it's time to start removing the LCD panel from the lid assembly. This is where a lot of DIY attempts go wrong; a lot of repairers will use too much heat, warping the fragile backlight sheets behind the screen, or they will forcibly pry the screen up, usually slipping and scratching the backlight sheets. We use the correct amount of heat to soften the adhesive enough to lift the screen up.


Working our way around the screen panel, we manage to lift the screen from 2 of the sides, allowing us to lift the LCD off of the final side, as if it were on a hinge. As predicted, the screen is cracked on this left side, out of view of the screen image itself, which is always the case with damage like this.

Cleaning up any shards of glass, we proceed to apply our own adhesive to hold the backlight sheets in place, which will also hold the new screen in place, along with the old adhesive we will be reusing.

Connecting the new screen up, being careful about the L shaped folded backlight cable, we proceed to test the new screen panel before fitting. Happy with this, we remove the adhesive backing, LCD panel protective film and use compressed air to make sure no dust is sitting on the backlight sheets or LCD panel, which will be visible through the new screen.


The LCD panel is now fitted and the screen is working fine! We now fit the original silver bezel back using the double sided adhesive from earlier, and re-apply the protective film we removed earlier on the new screen (although unnecessary, we do this to protect the new screen, and it's satisfying for the customer to remove this once received back). The screen looks good as new, and we have another happy customer!

If you need a screen replacement on your MacBook Air 13" 2010-2017 (model numbers A1369 and A1466), we can help! Feel free to book it for our LCD replacement repair and we can replace your broken screen with a new one, whilst retaining your original aluminium lid, camera and bezel.
Share this post
0 comment
